
A manual in 7 easy steps
In one of my grandest schemes to date, I decided to push several self-limits at once and hike the entirety of Malibu’s recently completed Backbone Trail System in only 3 days. For those of you who aren’t LA local, that’s 70 miles of peaks and valleys, traversing along the Santa Monica Mountains, just spitting distance from Los Angeles! It promised to be relatively waterless, 40 degrees at night, difficult to navigate, and illegal to camp on (technically). Oh, and the gods decided to grace me with a massive rainstorm in the middle of day two that left me sliding down the side of a mountain in the pitched black, hiking through multi-million dollar Malibu estates, and finally befriending a valet at a 4 star restaurant who let me charge my phone and call a ride home. Even with a TON of planning and back ups in case of things going wrong, the trek decided to take a left turn in a hilarious assortment of unexpected ways, leaving me to bail on night two and return to complete the last 24 miles of trail the following weekend. So, I felt it only fitting to write a how-to manual in reverse for what not to do on The Backbone Trail!

1. Don’t try to hike the whole thing in a 3 day weekend.
Unless you’re a pro trail runner or a masochist (quietly raises hand), I would seriously suggest doing this as a 4 or even a 5 day thru-hike. Don’t get me wrong, I’m big on challenges and pushing my body to see what it can do. I saw 3 bears with a 35 lb. pack on during a 17 mile hike at elevation, and I thought that was a GREAT day. But the Backbone Trail is more challenging than it seems. It’s not flat like, ever. Plus, due to its proximity to Los Angeles and low elevation, it’s quite tempting to hike it in the winter when weekend warrior favorites like Sequoia and Yosemite are snow-bound. I pushed for 24 mile days during the darkest part of the year, leaving little room for error, and boy did I get my ass handed to me. Cut the miles, have more time to explore, and climb more boulders!
The Perfect 4-day, 3-night Backbone Trail Itinerary:
- Do a big, 21 mile first day. There are amazing turn-outs on the fire road just after the switchbacks off the second Yerba Buena Rd. crossing.
- Hike 16-17 miles the second day. Spend your second night on the gorgeous, panoramic fire road that veers left before descending into Malibu Canyon.
- Hike 17 miles to Musch Camp on your third day. This is the one legal trail camp set up for thru-hikers, and there’s water nearby at Trippet Ranch, which is a godsend!
- Hike out the remaining 11.1 miles on your last day and relish sleeping in your own bed the fourth night!

2. Don’t hike it without a GPS.
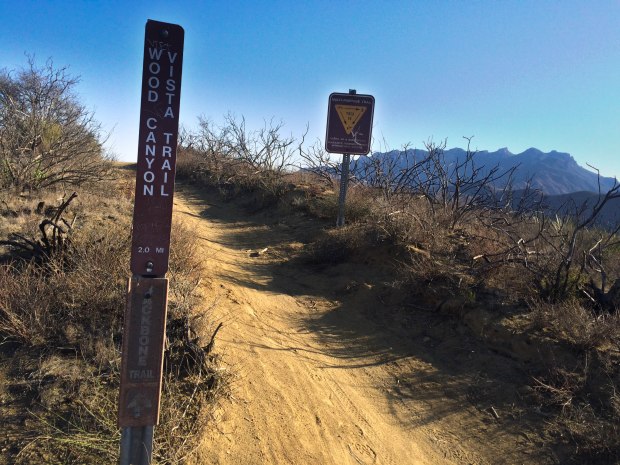
If you GPS cuts out or loses charge at any point on this trail, I would highly suggest calling it. Of course, I am a stubborn monkey who typed out directions (see photo for reference) for every twist and turn of the trail just in case such a travesty befell me. And yes, my GPS did decide to stop charging halfway through day 1. Lesson learned. By far the most difficult parts of the trail to navigate are between Encinal Canyon and Old Topanga Rd. There’s another tricky turn about 5 miles before descending into Will Rogers Park as well. Though the trail was technically “finished” in spring of 2016, it is not nearly well-marked enough to thru-hike without a map or GPS. The rangers I talked with agreed. Don’t add time to what are already long days. Your ankles, knees, and butt will thank you.

3. Don’t hike it in a rainstorm.
A drizzle sure, but a full-on, pouring rain thunderstorm is what I got gifted on this beautiful misadventure, and there were moments that were equal parts frustrating and laughable. After Corral Canyon, there’s a long stretch of fire-road made of clay. I got to learn in the most fabulous, soggy, sweat-covered way what happens when you hike through wet clay for an extended period of time – your hiking boots turn into platforms! I waddled around, scraping off this bright red clay onto every sandstone formation I passed for what seemed like an eternity. Save yourself the pain (and extra weight in your feet!) and try to pick a weekend with cool temperatures and no precipitation. It’s Los Angeles. Shouldn’t be too hard! 🙂

4. Don’t let your friends scare you about mountain lions or wild camping!
So, I think my friends are rather… fanciful. One was positively convinced that I would be instantaneously stalked by a mountain lion if I decided to hike this trail system. Naturally, I did a bit of research, and yes, there are about 14 or so pumas circling the Santa Monica Mountains. In fact, LA is one of only 2 major cities with big cats living within city limits (the other is Mumbai). But they rarely ever attack humans. You’re much more likely to get killed by a dog in Los Angeles than a mountain lion. Sure enough, first thing on day 1, I met a couple of trail runners who were SO HARDCORE and had been all over every inch of these mountains during various training runs. They had never even seen a mountain lion in all their years. As for the wild camping, I wouldn’t worry too much about where you pitch your tent. Just don’t put it up until it’s right about dark, absolutely no fires, and don’t camp out right next to anyone’s house.

5. Don’t keep going when you lose multiple pieces of gear.
Maybe the mountain is against you; maybe the god of the trail has decided to curse you due to an ancient, ancestral misunderstanding! Whatever the case may be, finishing a multi-day trek without several pieces of your already limited possessions can be needlessly excruciating. The trail will be there next month, but there’s only one you! Once again, I am headstrong and ridiculous when it comes to powering through goals I’ve set for myself, so this was not a rule I followed. On this trip I lost my trekking poles in a briar, my warm hat while trail running, and half a bottle of water to the god of chaos. My solar charger, cell phone, headlamp, and solar camp light all decided that I needed to climb mountains like John Muir did in the good old days and promptly quit working to give me an extra challenge (I guess?). Sure, it made for one hell of an adventure, and now, I think it’s hilarious, but I would have saved myself so much heartache if I knew to quit when only 1-2 crucial pieces of gear went amiss!

6. Don’t underestimate your water drops.
Here’s the thing… The Backbone Trail is dry. Really dry. You have to carry more water than you ordinarily would, and even then, you’ll need to plan out water drops for yourself at cleverly strategic points where the trail meets the road. I had my water drop at the first Yerba Buena Rd. crossing, but I probably should have pushed it into the beginning of day 2, near Mulholland Hwy. Water is often slightly off trail in weird areas, so plan extra time to look for it, and don’t be afraid to make friends with strangers and ask! At Danielson Ranch, for example, you have to pass a non-potable water spigot and walk a little off trail to get to the drinking water. At Tapia Park, I almost missed the water fountain completely, because it’s quite a bit off trail and past Piuma Road to the north. If I were to hike it again as a 4 day, I would probably water drop at the second crossing of Yerba Buena Rd. and again at Corral Canyon to allow for ample cooking water at night and drinking water during the day. No matter what you decide, I highly recommend bringing more water than you think you’ll need. There are multiple, punishing ascents in full sun that get damn toasty, even in winter.
7. Don’t attempt the full Backbone Trail without a solid game-plan!
Unfortunately, though technically “finished” as of spring 2016, The Backbone Trail isn’t an easy thru-hike just yet. The parks service does have an extensive plan to add more trail camps, water, signs, and resources, but it just isn’t there yet. The official stance on the National Park Service’s website is that The Backbone Trail is unsuitable for thru-hiking at this time. Even with all my organization, research, extra gear, and planning, a lot went wrong, and I’m glad that I was so close to a road and the city when I decided to call it on night two. Even with a GPS and a solid night’s sleep, returning to hike the last 24 miles I planned for day 3 was no picnic! Plan your route well, buy a good topo map or GPS, and water drop where you think you’ll need it.
The Backbone Trail is full of sweeping vistas, panoramic views of the Pacific Ocean, and breathtaking sandstone formations. Despite my relative lack of photos (due to my phone dying on day 1), the experience of hiking the entire thing was truly incredible. When the rain cleared and the sun cascaded through huge, white clouds littering the sky at the end of my second day, I was completely dazzled. It’s rare to feel lost in the wild so close to home, and I think it’s amazing that we have such a long and varied trail right in our backyard. If you haven’t yet already, challenge yourself to a long day hike along this gem! Who knows what adventure lies in store?
It’s funny to think that my blog posts in the future are going to be more about “how to not to it wrong next time” rather than “check out these awesome experiences I had”. LOL!
RE: mountain lions, yeah they’re just puddycats! I had in the time I spent wild camping in the US only 2 bear visit me while I was sleeping and 1 mountain lion. Bear are like soppy dogs they’re just curious big stupid smoosh-faces that are hungry. Cats on the other the hand will scare you a lot before they decide to leave you alone. All the same, people over-exaggerate and you wont honestly have any issues just as long as you have your smelly stuff in air/water-tight bags.
I dig your writings! Moar plz!
looks like you found a secret hiding spot on Backbone trail 🙂
There are many! Lots of great spots to take a break with great ocean views!
I’m all about discovering tucked away spots that I feel no-one has yet to.
Informative article..My last hike was the AT and took 7 months…I am now weighing each piece of gear; trying to get below 40 lbs. Big unknown is need for a tent—-any suggestions?
Yes! The Big Agnes Copper Spur is amazing for freestanding. Otherwise, the Zpacks is excellent if you don’t mind a trekking pole tent.